Maybe you asking yourself why should I use image Optimizer ?, so it’s for a simple raison to save you bandwidth and storage space and will dramatically improve your website’s load times.
In this post I am gonna show you how to use Image Optimizer with visual studio.
if you don’t already have visual studio you can download a free version of visual studio https://www.visualstudio.com/vs/community/.
What is Image Optimizer?
Image Optimizer is visual studio extension that you can use to optimize any JPEG, PNG and Gifs - including animated Gifs. It can do both lossy and lossless optimization.
- First you can download https://marketplace.visualstudio.com/items?itemName=MadsKristensen.ImageOptimizer
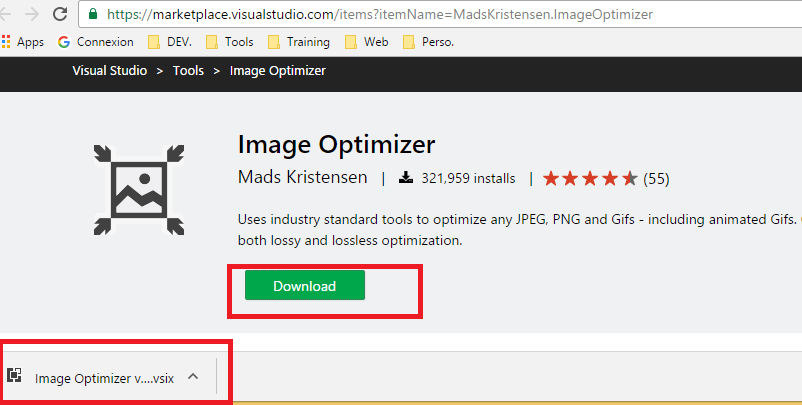
-
Click to install the extension.
-
Restart Visual studio
-
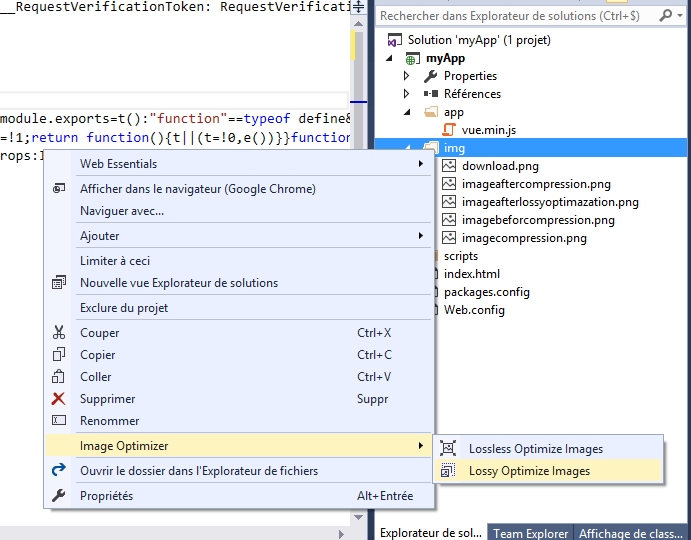
Create / Open visual studio project.
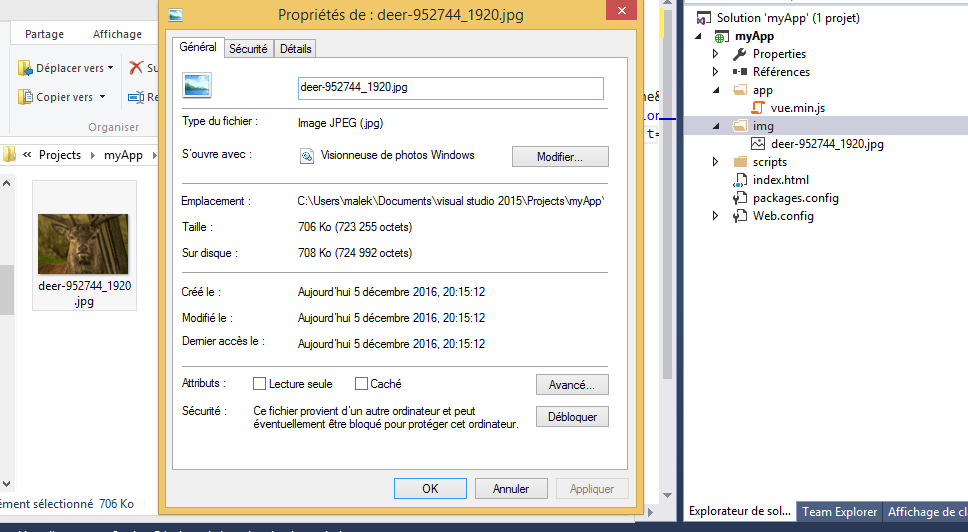
Right-click any file or folder containing images and click one of the image optimization buttons.
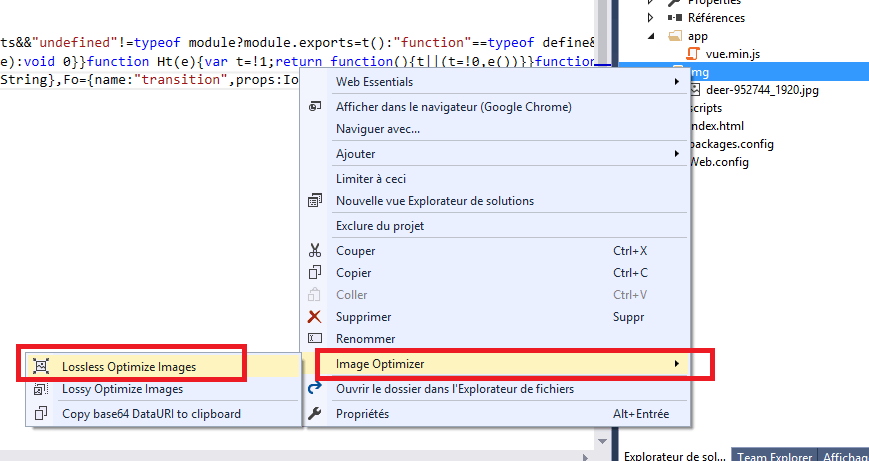
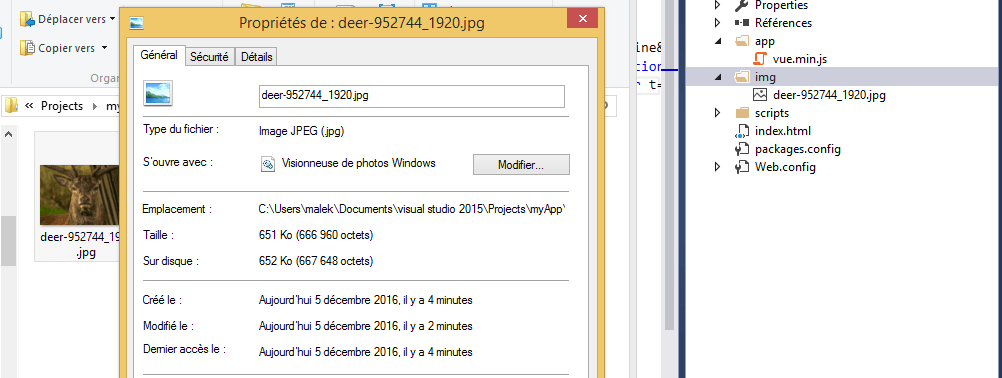
Lossless optimization
This will optimize the image without changing the quality of the image.
Lossy optimizations
If you can sacrifice just a small amount of image quality (which in most cases is unnoticeable to the human eye), you will be able to save up to 90% of the initial file weight. Lossy optimization will give you outstanding results with just a fraction of image quality loss.
Now it’s time for me to optimize the post images.
That’s it!.