Instead of using your own user database to maintain user credentials. I will give you step by step demo on how to integrate Facebook login into you ASP.NET MVC 5 application.
This post shows you how to enables users to log in using OAuth 2.0 with credentials from an external authentication in our case Facebook.
if you don’t already have visual studio you can download a free version of visual studio https://www.visualstudio.com/vs/community/.
Create Asp.net web application
Create an MVC web application, launch visual studio and create a new asp.net MVC application:
-
Click New Project in the Start page or in the File menu.
-
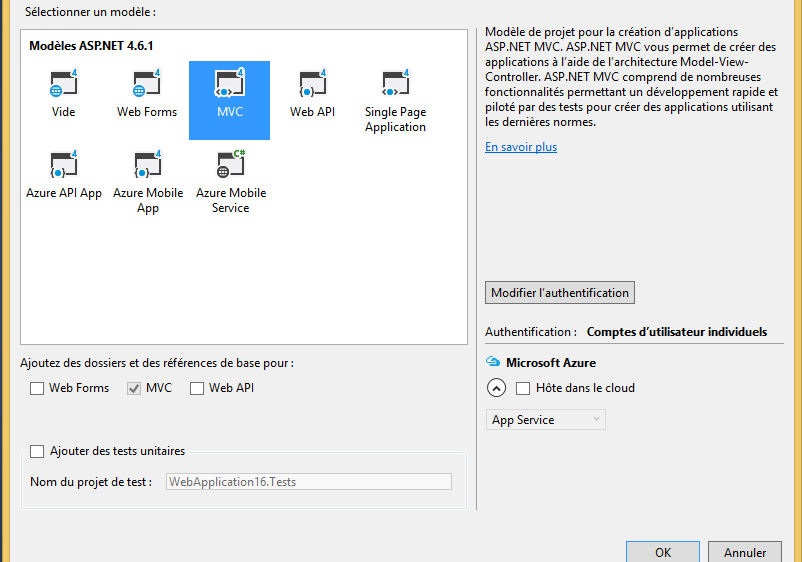
In the New Project dialog, click Web in the left pane and ASP.NET Web Application in the middle pane.
Specify project Name AspNetApp, Location, and other options, and then click OK.
- The New ASP.NET Project dialog appears Click a MVC template , and then click OK.
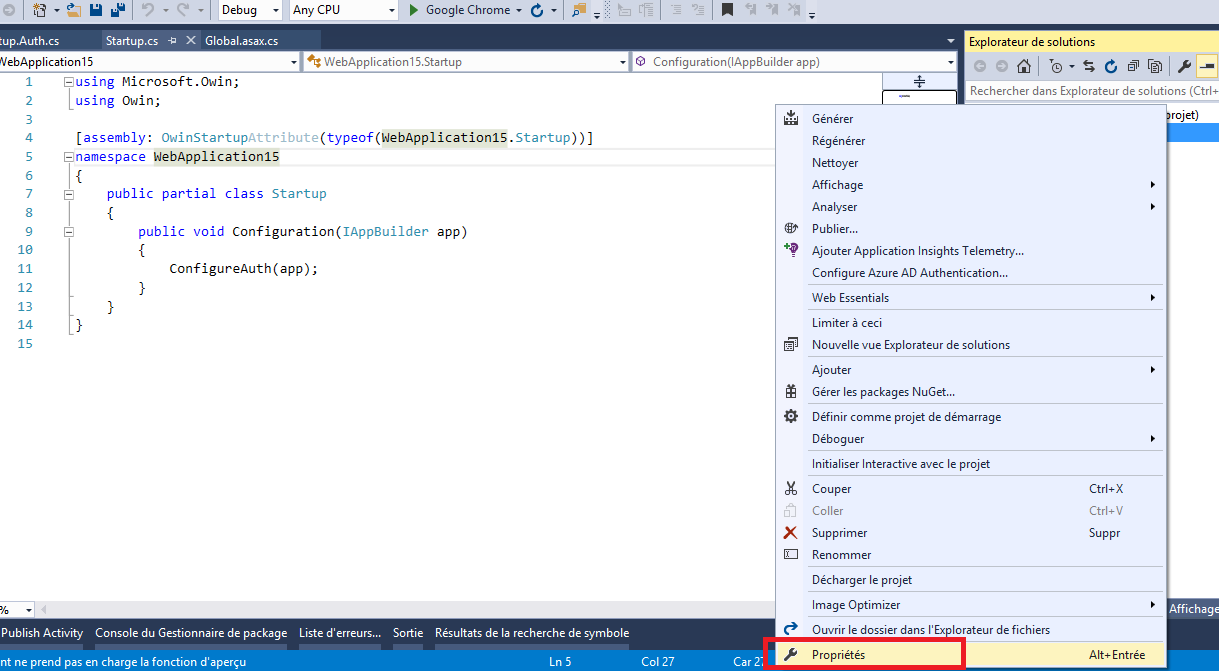
- In Solution Explorer, right click the project and select Properties.
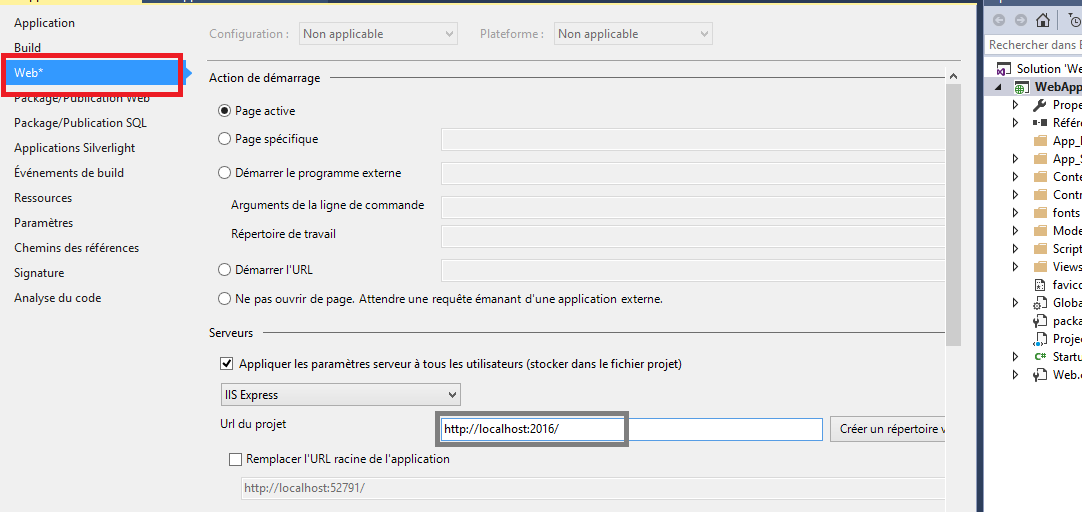
- Select the Web tab, and then paste the URL
http://localhost:2016into the Project Url box. Save the file.
Creating the app in Facebook
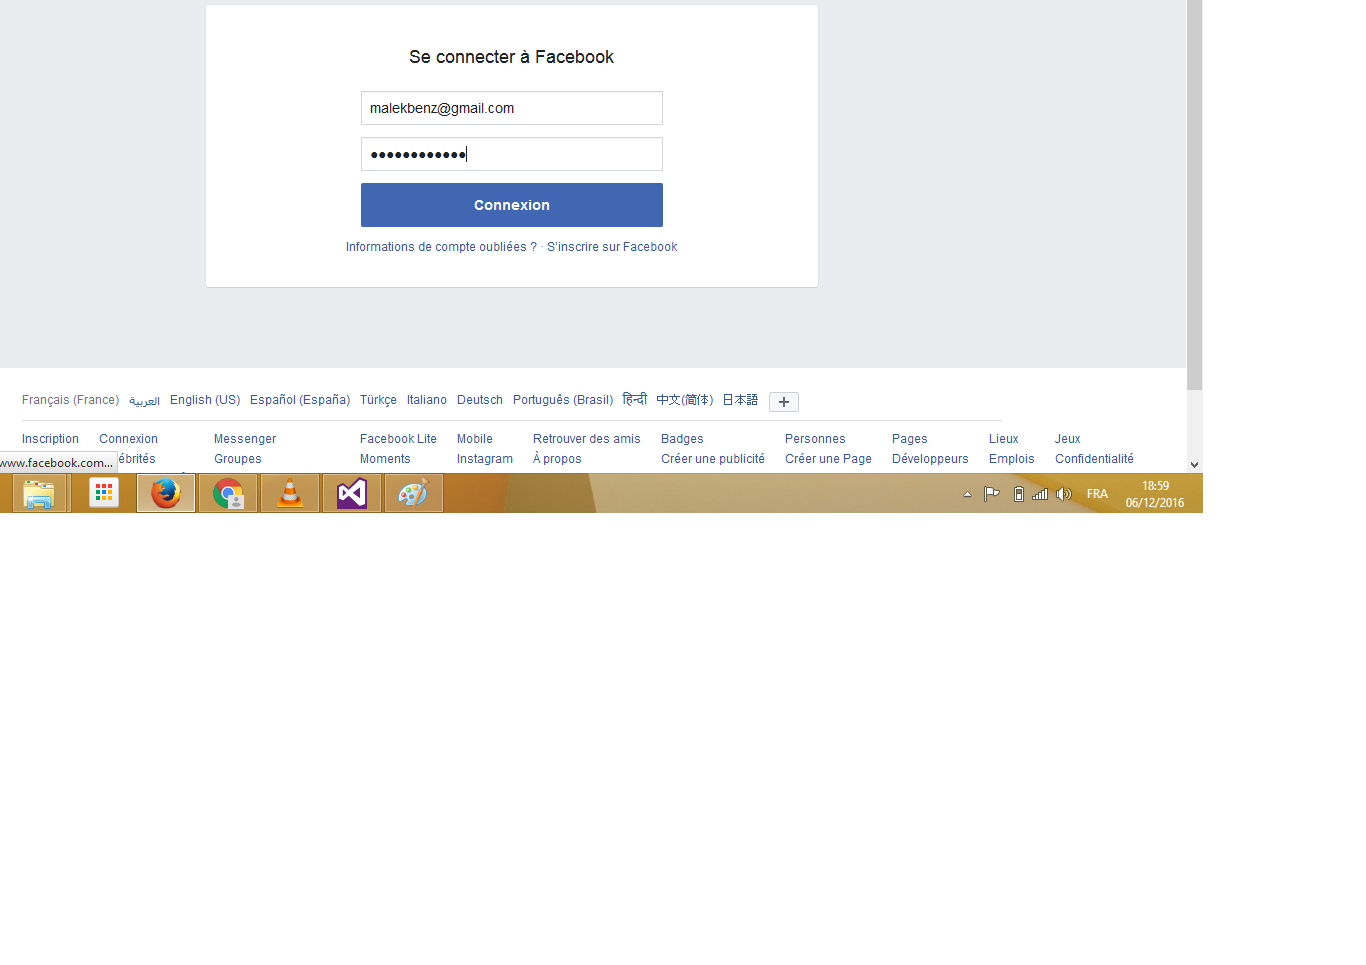
In the browser, navigate to https://developers.facebook.com/apps and log in by entering your Facebook credentials.
If you aren’t already registered as a Facebook developer, click Register as a Developer and follow the directions to register.
On the Apps tab, click Create New App.
- Enter an App Name and Category, then click Create App.
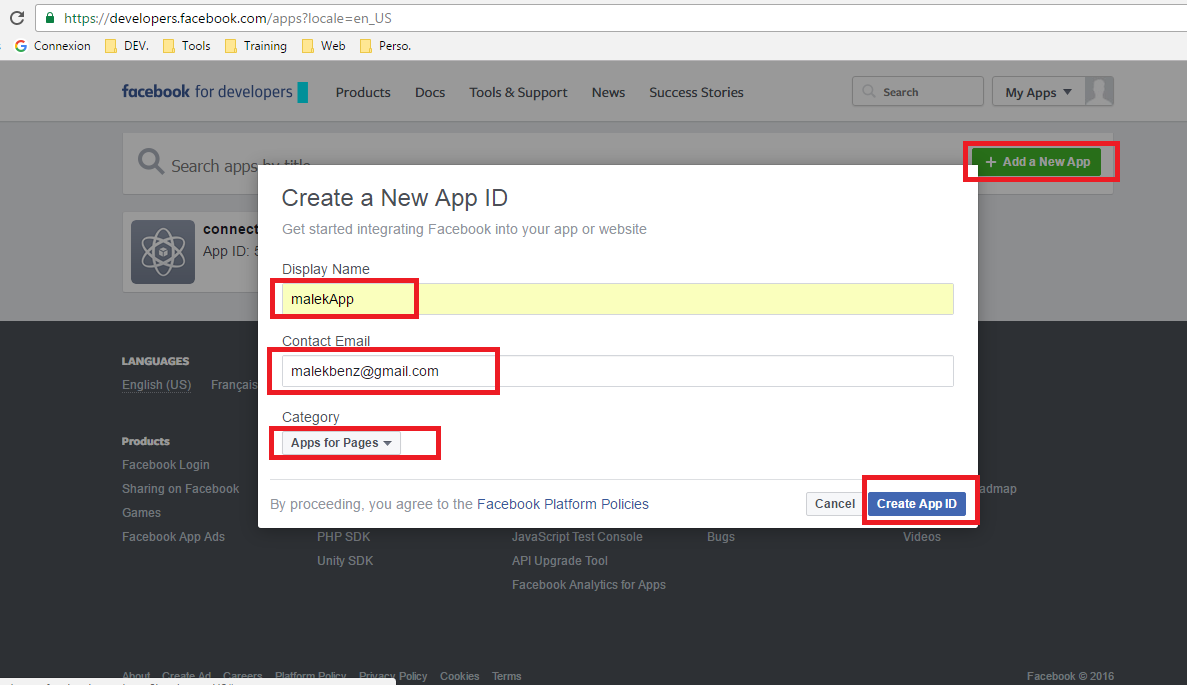
This must be unique across Facebook. The App Namespace is the part of the URL that your App will use to access the Facebook application for authentication (for example, https://apps.facebook.com/{App Namespace}). If you don’t specify an App Namespace, the App ID will be used for the URL. The App ID is a long system-generated number that you will see in the next step.
- Select Settings for the left menu bar.
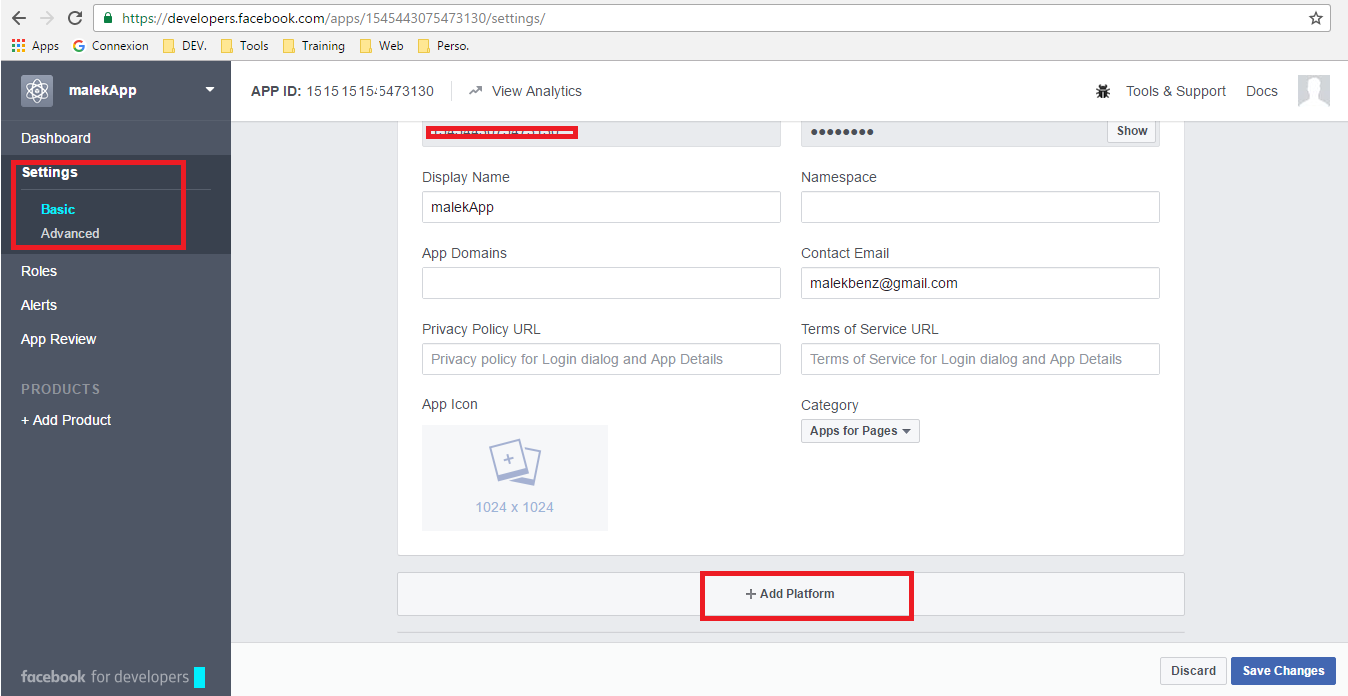
- select Add Platform to specify that you are adding a website application.
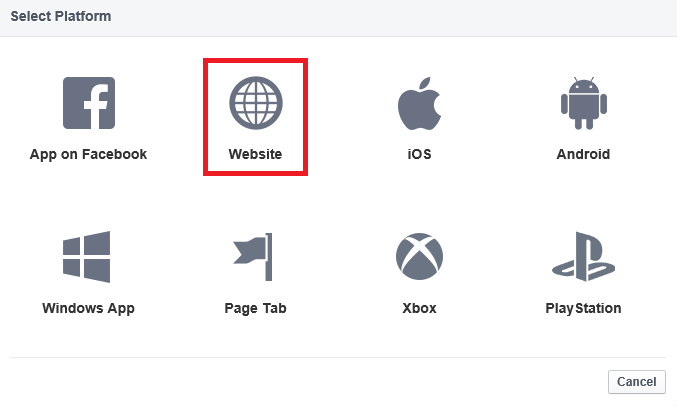
- Select Website from the platform choices.
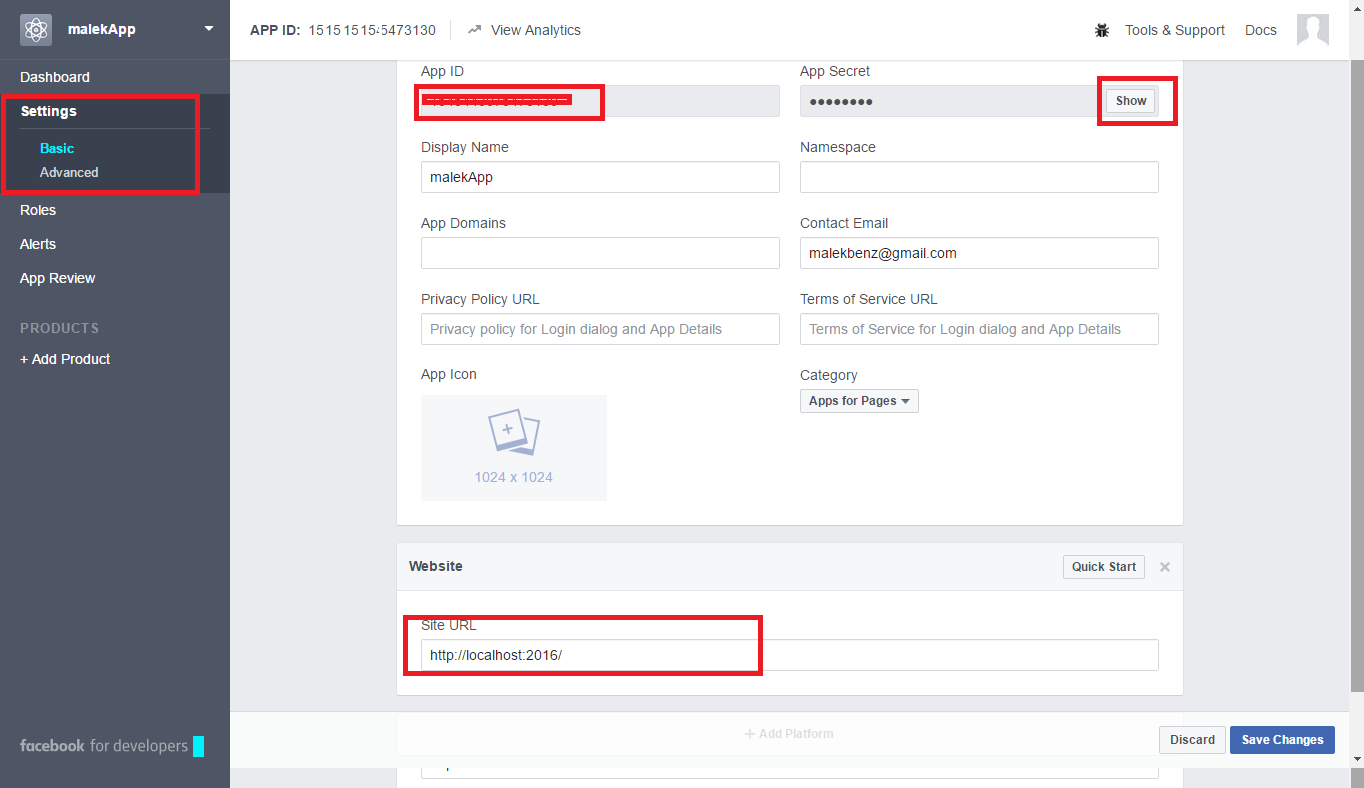
- Your App ID and your App Secret will be added both into your MVC application later. Also, Add your Site URL (http://localhost:2016/) to test your MVC application. Also, add a Contact Email. Then, select Save Changes.
Connecting the Facebook app to our project
- In Visual Studio, open App_Start\Startup.Auth.cs.
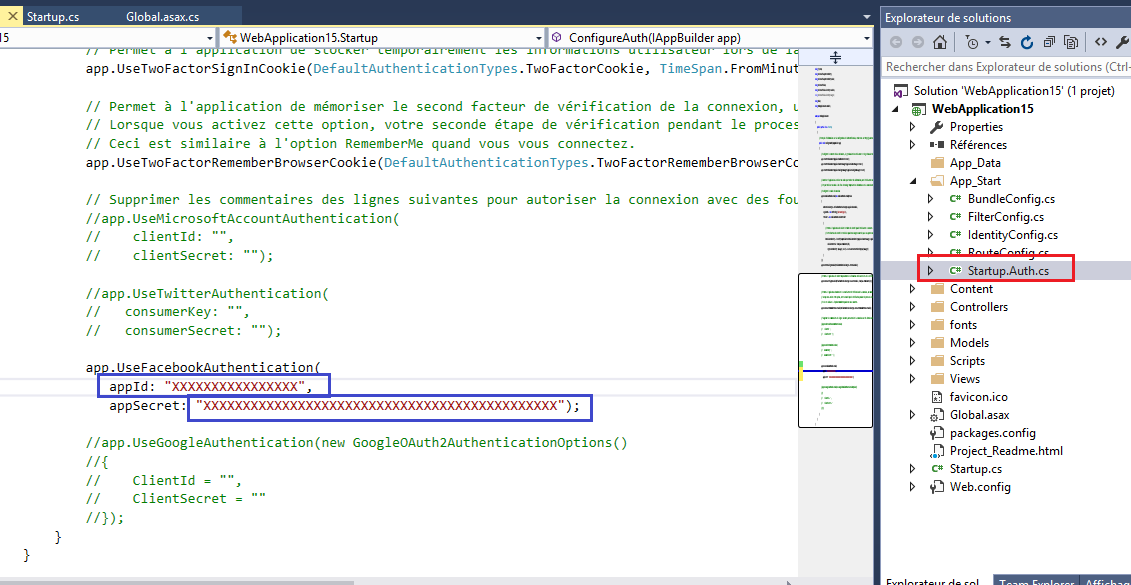
-
Copy and paste the
AppIdandApp Secretinto theUseFacebookAuthenticationmethod. -
Click Save Changes.
-
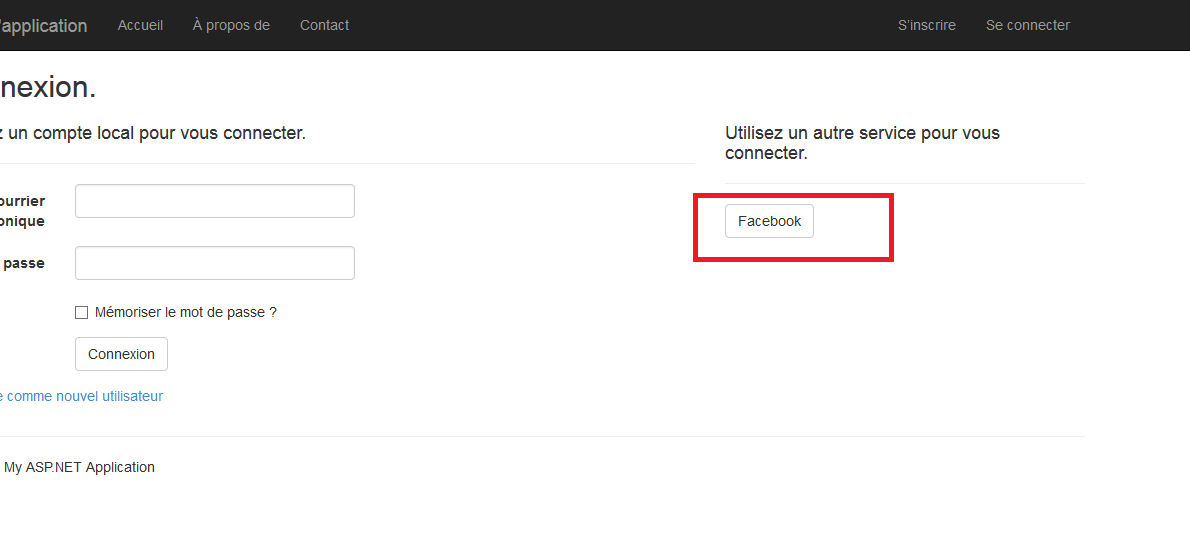
Run the application.
-
Select Log in to display the Login page. Click
Facebookunder Use another service to log in.
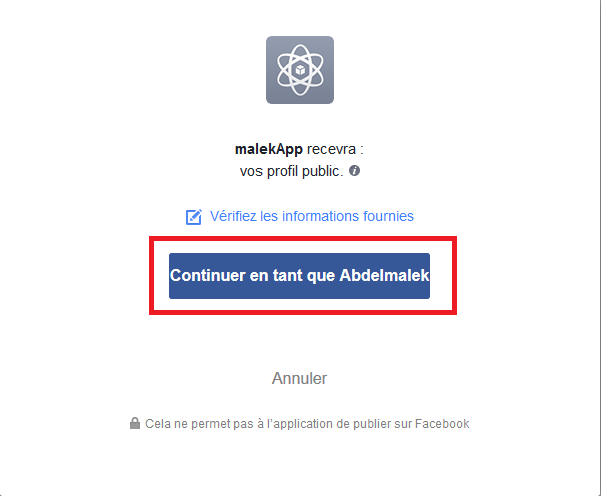
- Enter your Facebook credentials.
- You will be prompted to grant permission for the application to access your public profile and friend list.
- You are now logged in. You can now register this account with the application.
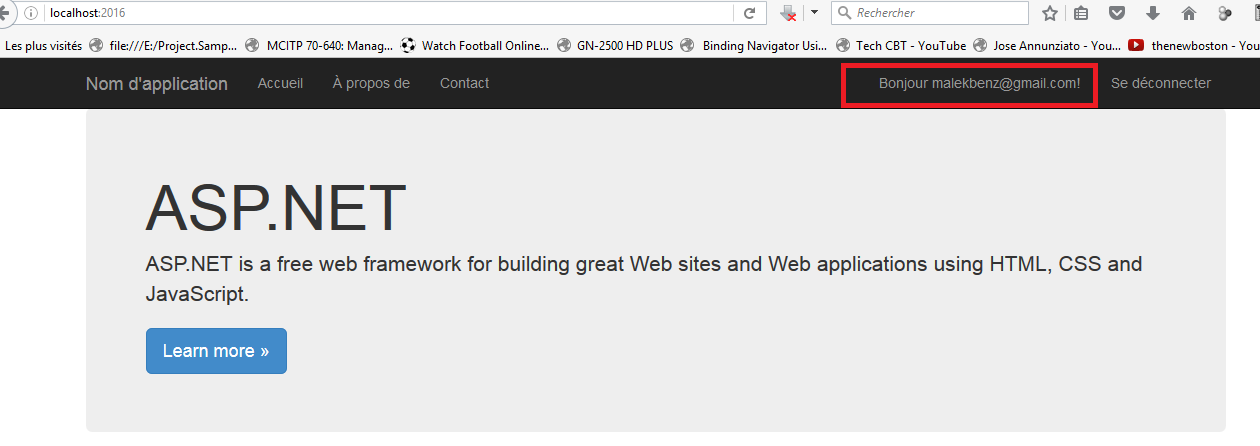
That’s it!.